
Commercial Lighting


Original price
£36.40
Original price
£36.40
-
Original price
£36.40
Original price
£36.40
Current price
£23.10
Exc VAT
Current price
£27.72
Inc VAT
£27.72
-
£27.72
Current price
£27.72
Inc VAT
£27.72
-
£27.72
Exc VAT
Current price
£27.72
Exc VAT
Aurora BackLiteCWS AU-BLPP6060CWS 230V 18/22/26W LED IP20 600x600mm Backlit Panel 3000/4000/6500K
Availability:
Dispatch in 1-2 Days
Aurora BackLiteCWS AU-BLPP6060CWS 230V 18/22/26W LED IP20 600x600mm Backlit Panel 3000/4000/6500K Product Description BackLiteCWS™ Colour & Wa...
View full details
Original price
£36.40
Original price
£36.40
-
Original price
£36.40
Original price
£36.40
Current price
£23.10
Exc VAT
Current price
£27.72
Inc VAT
£27.72
-
£27.72
Current price
£27.72
Inc VAT
£27.72
-
£27.72
Exc VAT
Current price
£27.72
Exc VAT

Original price
£87.91
-
Original price
£87.91
Original price
£73.26
Exc VAT
£87.91
Inc VAT
£87.91
-
£87.91
Current price
£87.91
Inc VAT
£87.91
-
£87.91
Exc VAT
Current price
£87.91
Exc VAT
Aurora BackLite AU-BLPP6060V/65 240V 26W LED IP54 600x600mm 1-10V Dimmable Backlit Panel 6500K
Availability:
Dispatch in 1-2 Days
Aurora BackLite AU-BLPP6060V/65 240V 26W LED IP54 600x600mm 1-10V Dimmable Backlit Panel 6500K Product Description BackLite™ 26W 3640lm 6500K 600 ...
View full details
Original price
£87.91
-
Original price
£87.91
Original price
£73.26
Exc VAT
£87.91
Inc VAT
£87.91
-
£87.91
Current price
£87.91
Inc VAT
£87.91
-
£87.91
Exc VAT
Current price
£87.91
Exc VAT

Original price
£87.91
-
Original price
£87.91
Original price
£73.26
Exc VAT
£87.91
Inc VAT
£87.91
-
£87.91
Current price
£87.91
Inc VAT
£87.91
-
£87.91
Exc VAT
Current price
£87.91
Exc VAT
Aurora BackLite AU-BLPP6060DA/65 240V 26W LED IP54 600x600mm DALI Dimmable Backlit Panel 6500K
Availability:
Dispatch in 1-2 Days
Aurora BackLite AU-BLPP6060DA/65 240V 26W LED IP54 600x600mm DALI Dimmable Backlit Panel 6500K Product Description BackLite™ 26W 3640lm 6500K 600 ...
View full details
Original price
£87.91
-
Original price
£87.91
Original price
£73.26
Exc VAT
£87.91
Inc VAT
£87.91
-
£87.91
Current price
£87.91
Inc VAT
£87.91
-
£87.91
Exc VAT
Current price
£87.91
Exc VAT

Original price
£35.37
-
Original price
£35.37
Original price
£29.48
Exc VAT
£35.37
Inc VAT
£35.37
-
£35.37
Current price
£35.37
Inc VAT
£35.37
-
£35.37
Exc VAT
Current price
£35.37
Exc VAT
Aurora BackLite AU-BLPP6060/65 240V 26W LED IP54 600x600mm Backlit Panel 6500K
Availability:
Dispatch in 1-2 Days
Aurora BackLite AU-BLPP6060/65 240V 26W LED IP54 600x600mm Backlit Panel 6500K Product Description BackLite™ 26W 3640lm 6500K 600 x 600mm Panel – ...
View full details
Original price
£35.37
-
Original price
£35.37
Original price
£29.48
Exc VAT
£35.37
Inc VAT
£35.37
-
£35.37
Current price
£35.37
Inc VAT
£35.37
-
£35.37
Exc VAT
Current price
£35.37
Exc VAT

Original price
£130.92
-
Original price
£130.92
Original price
£109.10
Exc VAT
£130.92
Inc VAT
£130.92
-
£130.92
Current price
£130.92
Inc VAT
£130.92
-
£130.92
Exc VAT
Current price
£130.92
Exc VAT
Aurora BackLite AU-BLPE1260V/65 240V 50W LED IP20 1200x600mm 1-10V Dimmable Backlit Panel 6500K
Availability:
Dispatch in 1-2 Days
Aurora BackLite AU-BLPE1260V/65 240V 50W LED IP20 1200x600mm 1-10V Dimmable Backlit Panel 6500K Product Description BackLite™ 50W 5000lm 6500K 120...
View full details
Original price
£130.92
-
Original price
£130.92
Original price
£109.10
Exc VAT
£130.92
Inc VAT
£130.92
-
£130.92
Current price
£130.92
Inc VAT
£130.92
-
£130.92
Exc VAT
Current price
£130.92
Exc VAT

Original price
£130.92
-
Original price
£130.92
Original price
£109.10
Exc VAT
£130.92
Inc VAT
£130.92
-
£130.92
Current price
£130.92
Inc VAT
£130.92
-
£130.92
Exc VAT
Current price
£130.92
Exc VAT
Aurora BackLite AU-BLPE1260DA/65 240V 50W LED IP20 1200x600mm DALI Dimmable Backlit Panel 6500K
Availability:
Dispatch in 1-2 Days
Aurora BackLite AU-BLPE1260DA/65 240V 50W LED IP20 1200x600mm DALI Dimmable Backlit Panel 6500K Product Description BackLite™ 50W 5000lm 6500K 120...
View full details
Original price
£130.92
-
Original price
£130.92
Original price
£109.10
Exc VAT
£130.92
Inc VAT
£130.92
-
£130.92
Current price
£130.92
Inc VAT
£130.92
-
£130.92
Exc VAT
Current price
£130.92
Exc VAT

Original price
£74.25
-
Original price
£74.25
Original price
£61.88
Exc VAT
£74.25
Inc VAT
£74.25
-
£74.25
Current price
£74.25
Inc VAT
£74.25
-
£74.25
Exc VAT
Current price
£74.25
Exc VAT
Aurora BackLite AU-BLPE1260/65 240V 50W LED IP20 1200x600mm Backlit Panel 6500K
Availability:
Dispatch in 1-2 Days
Aurora BackLite AU-BLPE1260/65 240V 50W LED IP20 1200x600mm Backlit Panel 6500K Product Description BackLite™ 50W 5000lm 6500K 1200 x 600mm Panel ...
View full details
Original price
£74.25
-
Original price
£74.25
Original price
£61.88
Exc VAT
£74.25
Inc VAT
£74.25
-
£74.25
Current price
£74.25
Inc VAT
£74.25
-
£74.25
Exc VAT
Current price
£74.25
Exc VAT

Original price
£100.34
-
Original price
£100.34
Original price
£83.62
Exc VAT
£100.34
Inc VAT
£100.34
-
£100.34
Current price
£100.34
Inc VAT
£100.34
-
£100.34
Exc VAT
Current price
£100.34
Exc VAT
Aurora BackLite AU-BLPE1230V/65 240V 36W LED IP20 1200x300mm 1-10V Dimmable Backlit Panel 6500K
Availability:
Dispatch in 1-2 Days
Aurora BackLite AU-BLPE1230V/65 240V 36W LED IP20 1200x300mm 1-10V Dimmable Backlit Panel 6500K Product Description BackLite™ 36W 3600lm 6500K 120...
View full details
Original price
£100.34
-
Original price
£100.34
Original price
£83.62
Exc VAT
£100.34
Inc VAT
£100.34
-
£100.34
Current price
£100.34
Inc VAT
£100.34
-
£100.34
Exc VAT
Current price
£100.34
Exc VAT

Original price
£43.01
-
Original price
£43.01
Original price
£35.84
Exc VAT
£43.01
Inc VAT
£43.01
-
£43.01
Current price
£43.01
Inc VAT
£43.01
-
£43.01
Exc VAT
Current price
£43.01
Exc VAT
Aurora BackLite AU-BLPE1230/65 240V 36W LED IP20 1200x300mm Backlit Panel 6500K
Availability:
Dispatch in 1-2 Days
Aurora BackLite AU-BLPE1230/65 240V 36W LED IP20 1200x300mm Backlit Panel 6500K Product Description BackLite™ 36W 3600lm 6500K 1200 x 300mm Panel ...
View full details
Original price
£43.01
-
Original price
£43.01
Original price
£35.84
Exc VAT
£43.01
Inc VAT
£43.01
-
£43.01
Current price
£43.01
Inc VAT
£43.01
-
£43.01
Exc VAT
Current price
£43.01
Exc VAT

Original price
£100.34
-
Original price
£100.34
Original price
£83.62
Exc VAT
£100.34
Inc VAT
£100.34
-
£100.34
Current price
£100.34
Inc VAT
£100.34
-
£100.34
Exc VAT
Current price
£100.34
Exc VAT
Aurora BackLite AU-BLPE1230DA/65 240V 36W LED IP20 1200x300mm DALI Dimmable Backlit Panel 6500K
Availability:
Dispatch in 1-2 Days
Aurora BackLite AU-BLPE1230DA/65 240V 36W LED IP20 1200x300mm DALI Dimmable Backlit Panel 6500K Product Description BackLite™ 36W 3600lm 6500K 120...
View full details
Original price
£100.34
-
Original price
£100.34
Original price
£83.62
Exc VAT
£100.34
Inc VAT
£100.34
-
£100.34
Current price
£100.34
Inc VAT
£100.34
-
£100.34
Exc VAT
Current price
£100.34
Exc VAT

Original price
£149.04
-
Original price
£149.04
Original price
£124.20
Exc VAT
£149.04
Inc VAT
£149.04
-
£149.04
Current price
£149.04
Inc VAT
£149.04
-
£149.04
Exc VAT
Current price
£149.04
Exc VAT
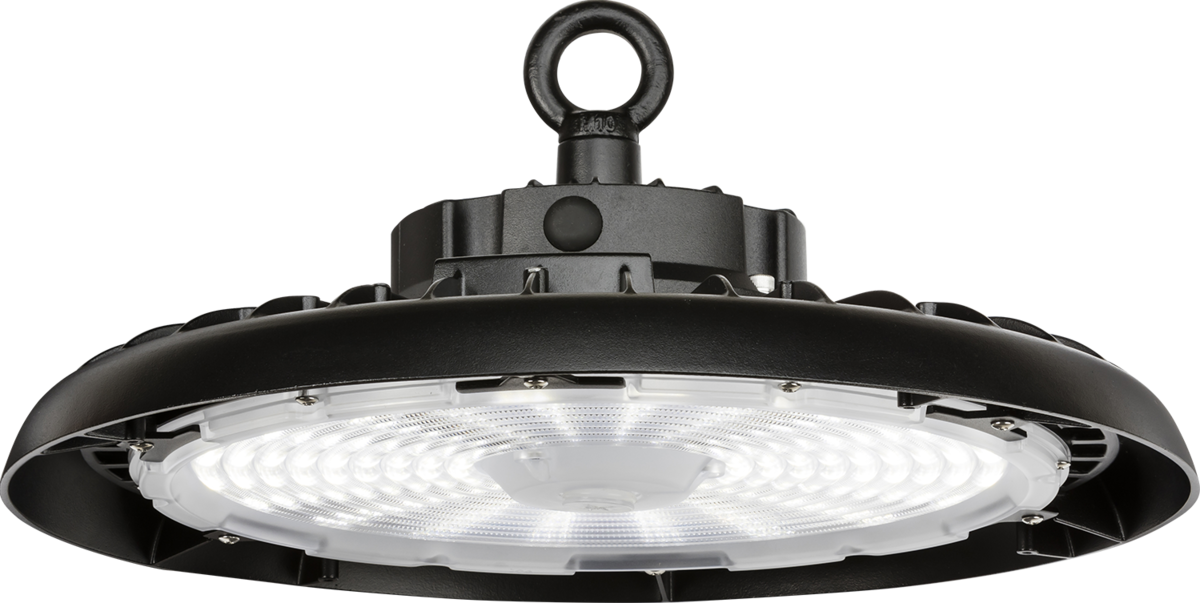
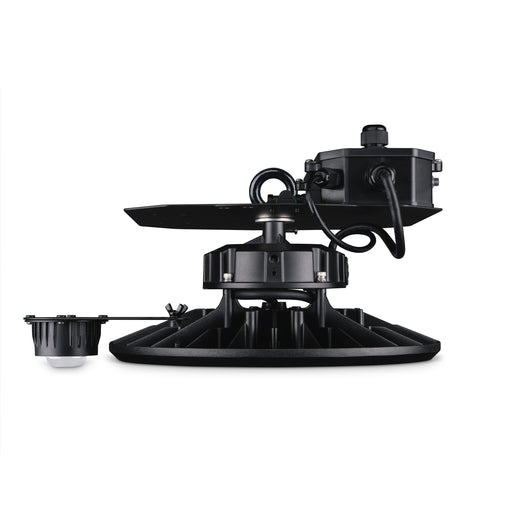
JCC JC040223 Toughbay Pro 200W (150W & 100W) IP65 4000K 28,000lm 120° 1-10V Dimmable Emergency Self-Test
Availability:
Dispatch in 4-5 Days
JCC JC040223 Toughbay Pro 200W (150W & 100W) IP65 4000K 28,000lm 120° 1-10V Dimmable Emergency Self-Test Product Description 100W, 150W and 200...
View full details
Original price
£149.04
-
Original price
£149.04
Original price
£124.20
Exc VAT
£149.04
Inc VAT
£149.04
-
£149.04
Current price
£149.04
Inc VAT
£149.04
-
£149.04
Exc VAT
Current price
£149.04
Exc VAT

Original price
£72.33
-
Original price
£72.33
Original price
£60.28
Exc VAT
£72.33
Inc VAT
£72.33
-
£72.33
Current price
£72.33
Inc VAT
£72.33
-
£72.33
Exc VAT
Current price
£72.33
Exc VAT
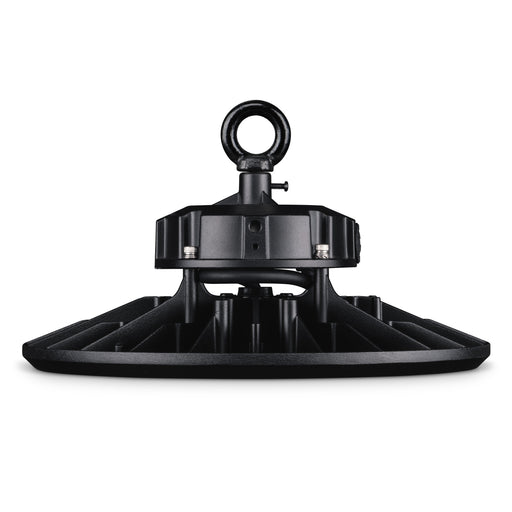
JCC JC040222 Toughbay Pro 200W (150W & 100W) IP65 4000K 28,000lm 120° 1-10V Dimmable
Availability:
Dispatch in 4-5 Days
JCC JC040222 Toughbay Pro 200W (150W & 100W) IP65 4000K 28,000lm 120° 1-10V Dimmable Product Description 100W, 150W and 200W options available ...
View full details
Original price
£72.33
-
Original price
£72.33
Original price
£60.28
Exc VAT
£72.33
Inc VAT
£72.33
-
£72.33
Current price
£72.33
Inc VAT
£72.33
-
£72.33
Exc VAT
Current price
£72.33
Exc VAT

Original price
£149.04
-
Original price
£149.04
Original price
£124.20
Exc VAT
£149.04
Inc VAT
£149.04
-
£149.04
Current price
£149.04
Inc VAT
£149.04
-
£149.04
Exc VAT
Current price
£149.04
Exc VAT
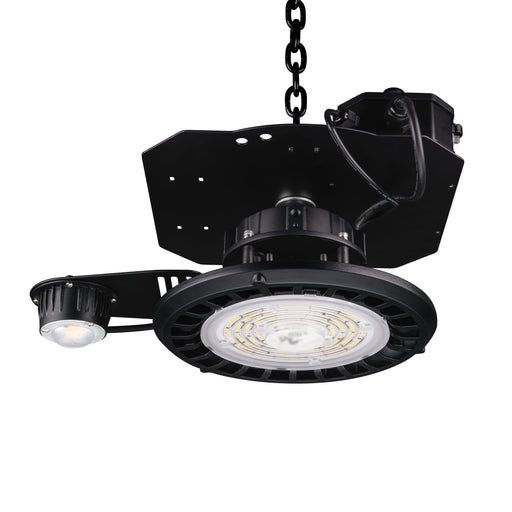
JCC JC040221 Toughbay Pro 200W (150W & 100W) IP65 4000K 90° 1-10V Dimmable Emergency Self-Test
Availability:
Dispatch in 4-5 Days
JCC JC040221 Toughbay Pro 200W (150W & 100W) IP65 4000K 90° 1-10V Dimmable Emergency Self-Test Product Description 100W, 150W and 200W options ...
View full details
Original price
£149.04
-
Original price
£149.04
Original price
£124.20
Exc VAT
£149.04
Inc VAT
£149.04
-
£149.04
Current price
£149.04
Inc VAT
£149.04
-
£149.04
Exc VAT
Current price
£149.04
Exc VAT

Original price
£72.33
-
Original price
£72.33
Original price
£60.28
Exc VAT
£72.33
Inc VAT
£72.33
-
£72.33
Current price
£72.33
Inc VAT
£72.33
-
£72.33
Exc VAT
Current price
£72.33
Exc VAT
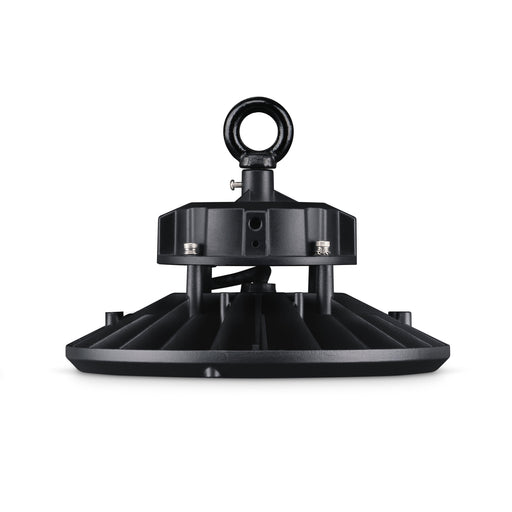
JCC JC040220 Toughbay Pro 200W (150W & 100W) IP65 4000K 90° 1-10V Dimmable
Availability:
Dispatch in 4-5 Days
JCC JC040220 Toughbay Pro 200W (150W & 100W) IP65 4000K 90° 1-10V Dimmable Product Description 100W, 150W and 200W options available with Watta...
View full details
Original price
£72.33
-
Original price
£72.33
Original price
£60.28
Exc VAT
£72.33
Inc VAT
£72.33
-
£72.33
Current price
£72.33
Inc VAT
£72.33
-
£72.33
Exc VAT
Current price
£72.33
Exc VAT

Original price
£149.04
-
Original price
£149.04
Original price
£124.20
Exc VAT
£149.04
Inc VAT
£149.04
-
£149.04
Current price
£149.04
Inc VAT
£149.04
-
£149.04
Exc VAT
Current price
£149.04
Exc VAT
JCC JC040219 Toughbay Pro 200W (150W & 100W) IP65 4000K 60° 1-10V Dimmable Emergency Self-Test
Availability:
Dispatch in 2-3 Days
JCC JC040219 Toughbay Pro 200W (150W & 100W) IP65 4000K 60° 1-10V Dimmable Emergency Self-Test Product Description 100W, 150W and 200W options ...
View full details
Original price
£149.04
-
Original price
£149.04
Original price
£124.20
Exc VAT
£149.04
Inc VAT
£149.04
-
£149.04
Current price
£149.04
Inc VAT
£149.04
-
£149.04
Exc VAT
Current price
£149.04
Exc VAT

Original price
£72.58
-
Original price
£72.58
Original price
£60.48
Exc VAT
£72.58
Inc VAT
£72.58
-
£72.58
Current price
£72.58
Inc VAT
£72.58
-
£72.58
Exc VAT
Current price
£72.58
Exc VAT
JCC JC040218 Toughbay Pro 200W (150W & 100W) IP65 4000K 60° 1-10V Dimmable
Availability:
Dispatch in 2-3 Days
JCC JC040218 Toughbay Pro 200W (150W & 100W) IP65 4000K 60° 1-10V Dimmable Product Description 100W, 150W and 200W options available with Watta...
View full details
Original price
£72.58
-
Original price
£72.58
Original price
£60.48
Exc VAT
£72.58
Inc VAT
£72.58
-
£72.58
Current price
£72.58
Inc VAT
£72.58
-
£72.58
Exc VAT
Current price
£72.58
Exc VAT
Original price
£149.83
-
Original price
£149.83
Original price
£124.86
Exc VAT
£149.83
Inc VAT
£149.83
-
£149.83
Current price
£149.83
Inc VAT
£149.83
-
£149.83
Exc VAT
Current price
£149.83
Exc VAT
JCC JC040217 Toughbay Pro 200W (150W & 100W) IP65 5700K 28,000lm 120° 1-10V Dimmable Emergency Self-Test
Availability:
Dispatch in 2-3 Days
JCC JC040217 Toughbay Pro 200W (150W & 100W) IP65 5700K 28,000lm 120° 1-10V Dimmable Emergency Self-Test Product Description 100W, 150W and 200...
View full details
Original price
£149.83
-
Original price
£149.83
Original price
£124.86
Exc VAT
£149.83
Inc VAT
£149.83
-
£149.83
Current price
£149.83
Inc VAT
£149.83
-
£149.83
Exc VAT
Current price
£149.83
Exc VAT

Original price
£149.83
-
Original price
£149.83
Original price
£124.86
Exc VAT
£149.83
Inc VAT
£149.83
-
£149.83
Current price
£149.83
Inc VAT
£149.83
-
£149.83
Exc VAT
Current price
£149.83
Exc VAT
JCC JC040215 Toughbay Pro 200W (150W & 100W) IP65 5700K 90° 1-10V Dimmable Emergency Self-Test
Availability:
Dispatch in 2-3 Days
JCC JC040215 Toughbay Pro 200W (150W & 100W) IP65 5700K 90° 1-10V Dimmable Emergency Self-Test Product Description 100W, 150W and 200W options ...
View full details
Original price
£149.83
-
Original price
£149.83
Original price
£124.86
Exc VAT
£149.83
Inc VAT
£149.83
-
£149.83
Current price
£149.83
Inc VAT
£149.83
-
£149.83
Exc VAT
Current price
£149.83
Exc VAT
Original price
£72.33
-
Original price
£72.33
Original price
£60.28
Exc VAT
£72.33
Inc VAT
£72.33
-
£72.33
Current price
£72.33
Inc VAT
£72.33
-
£72.33
Exc VAT
Current price
£72.33
Exc VAT
JCC JC040216 Toughbay Pro 200W (150W & 100W) IP65 5700K 28,000lm 120° 1-10V Dimmable
Availability:
Dispatch in 2-3 Days
JCC JC040216 Toughbay Pro 200W (150W & 100W) IP65 5700K 28,000lm 120° 1-10V Dimmable Product Description 100W, 150W and 200W options available ...
View full details
Original price
£72.33
-
Original price
£72.33
Original price
£60.28
Exc VAT
£72.33
Inc VAT
£72.33
-
£72.33
Current price
£72.33
Inc VAT
£72.33
-
£72.33
Exc VAT
Current price
£72.33
Exc VAT

Original price
£72.33
-
Original price
£72.33
Original price
£60.28
Exc VAT
£72.33
Inc VAT
£72.33
-
£72.33
Current price
£72.33
Inc VAT
£72.33
-
£72.33
Exc VAT
Current price
£72.33
Exc VAT
JCC JC040214 Toughbay Pro 200W (150W & 100W) IP65 5700K 90° 1-10V Dimmable
Availability:
Dispatch in 2-3 Days
JCC JC040214 Toughbay Pro 200W (150W & 100W) IP65 5700K 90° 1-10V Dimmable Product Description 100W, 150W and 200W options available with Watta...
View full details
Original price
£72.33
-
Original price
£72.33
Original price
£60.28
Exc VAT
£72.33
Inc VAT
£72.33
-
£72.33
Current price
£72.33
Inc VAT
£72.33
-
£72.33
Exc VAT
Current price
£72.33
Exc VAT

Original price
£149.83
-
Original price
£149.83
Original price
£124.86
Exc VAT
£149.83
Inc VAT
£149.83
-
£149.83
Current price
£149.83
Inc VAT
£149.83
-
£149.83
Exc VAT
Current price
£149.83
Exc VAT
JCC JC040213 Toughbay Pro 200W (150W & 100W) IP65 5700K 60° 1-10V Dimmable Emergency Self-Test
Availability:
Dispatch in 2-3 Days
JCC JC040213 Toughbay Pro 200W (150W & 100W) IP65 5700K 60° 1-10V Dimmable Emergency Self-Test Product Description 100W, 150W and 200W options ...
View full details
Original price
£149.83
-
Original price
£149.83
Original price
£124.86
Exc VAT
£149.83
Inc VAT
£149.83
-
£149.83
Current price
£149.83
Inc VAT
£149.83
-
£149.83
Exc VAT
Current price
£149.83
Exc VAT

Original price
£72.33
-
Original price
£72.33
Original price
£60.28
Exc VAT
£72.33
Inc VAT
£72.33
-
£72.33
Current price
£72.33
Inc VAT
£72.33
-
£72.33
Exc VAT
Current price
£72.33
Exc VAT
JCC JC040212 Toughbay Pro 200W (150W & 100W) IP65 5700K 60° 1-10V Dimmable
Availability:
Dispatch in 2-3 Days
JCC JC040212 Toughbay Pro 200W (150W & 100W) IP65 5700K 60° 1-10V Dimmable Product Description 100W, 150W and 200W options available with Watta...
View full details
Original price
£72.33
-
Original price
£72.33
Original price
£60.28
Exc VAT
£72.33
Inc VAT
£72.33
-
£72.33
Current price
£72.33
Inc VAT
£72.33
-
£72.33
Exc VAT
Current price
£72.33
Exc VAT
Original price
£142.61
-
Original price
£142.61
Original price
£118.84
Exc VAT
£142.61
Inc VAT
£142.61
-
£142.61
Current price
£142.61
Inc VAT
£142.61
-
£142.61
Exc VAT
Current price
£142.61
Exc VAT
JCC JC040211 Toughbay Pro 150W (115W & 80W) IP65 5700K 120° 1-10V Dimmable Emergency Self-Test
Availability:
Dispatch in 2-3 Days
JCC JC040211 Toughbay Pro 150W (115W & 80W) IP65 5700K 120° 1-10V Dimmable Emergency Self-Test Product Description 100W, 150W and 200W options ...
View full details
Original price
£142.61
-
Original price
£142.61
Original price
£118.84
Exc VAT
£142.61
Inc VAT
£142.61
-
£142.61
Current price
£142.61
Inc VAT
£142.61
-
£142.61
Exc VAT
Current price
£142.61
Exc VAT
Original price
£65.11
-
Original price
£65.11
Original price
£54.26
Exc VAT
£65.11
Inc VAT
£65.11
-
£65.11
Current price
£65.11
Inc VAT
£65.11
-
£65.11
Exc VAT
Current price
£65.11
Exc VAT
JCC JC040210 Toughbay Pro 150W (115W & 80W) IP65 5700K 120° 1-10V Dimmable
Availability:
Dispatch in 2-3 Days
JCC JC040210 Toughbay Pro 150W (115W & 80W) IP65 5700K 120° 1-10V Dimmable Product Description 100W, 150W and 200W options available with Watta...
View full details
Original price
£65.11
-
Original price
£65.11
Original price
£54.26
Exc VAT
£65.11
Inc VAT
£65.11
-
£65.11
Current price
£65.11
Inc VAT
£65.11
-
£65.11
Exc VAT
Current price
£65.11
Exc VAT

Original price
£142.61
-
Original price
£142.61
Original price
£118.84
Exc VAT
£142.61
Inc VAT
£142.61
-
£142.61
Current price
£142.61
Inc VAT
£142.61
-
£142.61
Exc VAT
Current price
£142.61
Exc VAT
JCC JC040209 Toughbay Pro 150W (115W & 80W) IP65 5700K 90° 1-10V Dimmable Emergency Self-Test
Availability:
Dispatch in 2-3 Days
JCC JC040209 Toughbay Pro 150W (115W & 80W) IP65 5700K 90° 1-10V Dimmable Emergency Self-Test Product Description 100W, 150W and 200W options a...
View full details
Original price
£142.61
-
Original price
£142.61
Original price
£118.84
Exc VAT
£142.61
Inc VAT
£142.61
-
£142.61
Current price
£142.61
Inc VAT
£142.61
-
£142.61
Exc VAT
Current price
£142.61
Exc VAT

Original price
£142.61
-
Original price
£142.61
Original price
£118.84
Exc VAT
£142.61
Inc VAT
£142.61
-
£142.61
Current price
£142.61
Inc VAT
£142.61
-
£142.61
Exc VAT
Current price
£142.61
Exc VAT
JCC JC040207 Toughbay Pro 150W (115W & 80W) IP65 5700K 60° 1-10V Dimmable Emergency Self-Test
Availability:
Dispatch in 2-3 Days
JCC JC040207 Toughbay Pro 150W (115W & 80W) IP65 5700K 60° 1-10V Dimmable Emergency Self-Test Product Description 100W, 150W and 200W options a...
View full details
Original price
£142.61
-
Original price
£142.61
Original price
£118.84
Exc VAT
£142.61
Inc VAT
£142.61
-
£142.61
Current price
£142.61
Inc VAT
£142.61
-
£142.61
Exc VAT
Current price
£142.61
Exc VAT

Original price
£65.11
-
Original price
£65.11
Original price
£54.26
Exc VAT
£65.11
Inc VAT
£65.11
-
£65.11
Current price
£65.11
Inc VAT
£65.11
-
£65.11
Exc VAT
Current price
£65.11
Exc VAT
JCC JC040208 Toughbay Pro 150W (115W & 80W) IP65 5700K 90° 1-10V Dimmable
Availability:
Dispatch in 2-3 Days
JCC JC040208 Toughbay Pro 150W (115W & 80W) IP65 5700K 90° 1-10V Dimmable Product Description 100W, 150W and 200W options available with Wattag...
View full details
Original price
£65.11
-
Original price
£65.11
Original price
£54.26
Exc VAT
£65.11
Inc VAT
£65.11
-
£65.11
Current price
£65.11
Inc VAT
£65.11
-
£65.11
Exc VAT
Current price
£65.11
Exc VAT

Original price
£65.11
-
Original price
£65.11
Original price
£54.26
Exc VAT
£65.11
Inc VAT
£65.11
-
£65.11
Current price
£65.11
Inc VAT
£65.11
-
£65.11
Exc VAT
Current price
£65.11
Exc VAT
JCC JC040206 Toughbay Pro 150W (115W & 80W) IP65 5700K 60° 1-10V Dimmable
Availability:
Dispatch in 2-3 Days
JCC JC040206 Toughbay Pro 150W (115W & 80W) IP65 5700K 60° 1-10V Dimmable Product Description 100W, 150W and 200W options available with Wattag...
View full details
Original price
£65.11
-
Original price
£65.11
Original price
£54.26
Exc VAT
£65.11
Inc VAT
£65.11
-
£65.11
Current price
£65.11
Inc VAT
£65.11
-
£65.11
Exc VAT
Current price
£65.11
Exc VAT

Original price
£135.46
-
Original price
£135.46
Original price
£112.88
Exc VAT
£135.46
Inc VAT
£135.46
-
£135.46
Current price
£135.46
Inc VAT
£135.46
-
£135.46
Exc VAT
Current price
£135.46
Exc VAT
JCC JC040205 Toughbay Pro 100W (75W & 50W) IP65 5700K 120° 1-10V Dimmable Emergency Self-Test
Availability:
Dispatch in 2-3 Days
JCC JC040205 Toughbay Pro 100W (75W & 50W) IP65 5700K 120° 1-10V Dimmable Emergency Self-Test Product Description 100W, 150W and 200W options a...
View full details
Original price
£135.46
-
Original price
£135.46
Original price
£112.88
Exc VAT
£135.46
Inc VAT
£135.46
-
£135.46
Current price
£135.46
Inc VAT
£135.46
-
£135.46
Exc VAT
Current price
£135.46
Exc VAT
Original price
£57.82
-
Original price
£57.82
Original price
£48.18
Exc VAT
£57.82
Inc VAT
£57.82
-
£57.82
Current price
£57.82
Inc VAT
£57.82
-
£57.82
Exc VAT
Current price
£57.82
Exc VAT
JCC JC040204 Toughbay Pro 100W (75W & 50W) IP65 5700K 120° 1-10V Dimmable
Availability:
Dispatch in 2-3 Days
JCC JC040204 Toughbay Pro 100W (75W & 50W) IP65 5700K 120° 1-10V Dimmable Product Description 100W, 150W and 200W options available with Wattag...
View full details
Original price
£57.82
-
Original price
£57.82
Original price
£48.18
Exc VAT
£57.82
Inc VAT
£57.82
-
£57.82
Current price
£57.82
Inc VAT
£57.82
-
£57.82
Exc VAT
Current price
£57.82
Exc VAT

Original price
£135.46
-
Original price
£135.46
Original price
£112.88
Exc VAT
£135.46
Inc VAT
£135.46
-
£135.46
Current price
£135.46
Inc VAT
£135.46
-
£135.46
Exc VAT
Current price
£135.46
Exc VAT
JCC JC040203 Toughbay Pro 100W (75W & 50W) IP65 5700K 90° 1-10V Dimmable Emergency Self-Test
Availability:
Dispatch in 2-3 Days
JCC JC040203 Toughbay Pro 100W (75W & 50W) IP65 5700K 90° 1-10V Dimmable Emergency Self-Test Product Description 100W, 150W and 200W options av...
View full details
Original price
£135.46
-
Original price
£135.46
Original price
£112.88
Exc VAT
£135.46
Inc VAT
£135.46
-
£135.46
Current price
£135.46
Inc VAT
£135.46
-
£135.46
Exc VAT
Current price
£135.46
Exc VAT

Original price
£135.46
-
Original price
£135.46
Original price
£112.88
Exc VAT
£135.46
Inc VAT
£135.46
-
£135.46
Current price
£135.46
Inc VAT
£135.46
-
£135.46
Exc VAT
Current price
£135.46
Exc VAT
JCC JC040201 Toughbay Pro 100W (75W & 50W) IP65 5700K 60° 1-10V Dimmable Emergency Self-Test
Availability:
Dispatch in 2-3 Days
JCC JC040201 Toughbay Pro 100W (75W & 50W) IP65 5700K 60° 1-10V Dimmable Emergency Self-Test Product Description 100W, 150W and 200W options av...
View full details
Original price
£135.46
-
Original price
£135.46
Original price
£112.88
Exc VAT
£135.46
Inc VAT
£135.46
-
£135.46
Current price
£135.46
Inc VAT
£135.46
-
£135.46
Exc VAT
Current price
£135.46
Exc VAT

Original price
£57.82
-
Original price
£57.82
Original price
£48.18
Exc VAT
£57.82
Inc VAT
£57.82
-
£57.82
Current price
£57.82
Inc VAT
£57.82
-
£57.82
Exc VAT
Current price
£57.82
Exc VAT
JCC JC040202 Toughbay Pro 100W (75W & 50W) IP65 5700K 90° 1-10V Dimmable
Availability:
Dispatch in 2-3 Days
JCC JC040202 Toughbay Pro 100W (75W & 50W) IP65 5700K 90° 1-10V Dimmable Product Description 100W, 150W and 200W options available with Wattage...
View full details
Original price
£57.82
-
Original price
£57.82
Original price
£48.18
Exc VAT
£57.82
Inc VAT
£57.82
-
£57.82
Current price
£57.82
Inc VAT
£57.82
-
£57.82
Exc VAT
Current price
£57.82
Exc VAT

Original price
£57.82
-
Original price
£57.82
Original price
£48.18
Exc VAT
£57.82
Inc VAT
£57.82
-
£57.82
Current price
£57.82
Inc VAT
£57.82
-
£57.82
Exc VAT
Current price
£57.82
Exc VAT
JCC JC040200 Toughbay Pro 100W (75W & 50W) IP65 5700K 60° 1-10V Dimmable
Availability:
Dispatch in 2-3 Days
JCC JC040200 Toughbay Pro 100W (75W & 50W) IP65 5700K 60° 1-10V Dimmable Product Description 100W, 150W and 200W options available with Wattage...
View full details
Original price
£57.82
-
Original price
£57.82
Original price
£48.18
Exc VAT
£57.82
Inc VAT
£57.82
-
£57.82
Current price
£57.82
Inc VAT
£57.82
-
£57.82
Exc VAT
Current price
£57.82
Exc VAT
Original price
£30.30
-
Original price
£30.30
Original price
£25.25
Exc VAT
£30.30
Inc VAT
£30.30
-
£30.30
Current price
£30.30
Inc VAT
£30.30
-
£30.30
Exc VAT
Current price
£30.30
Exc VAT
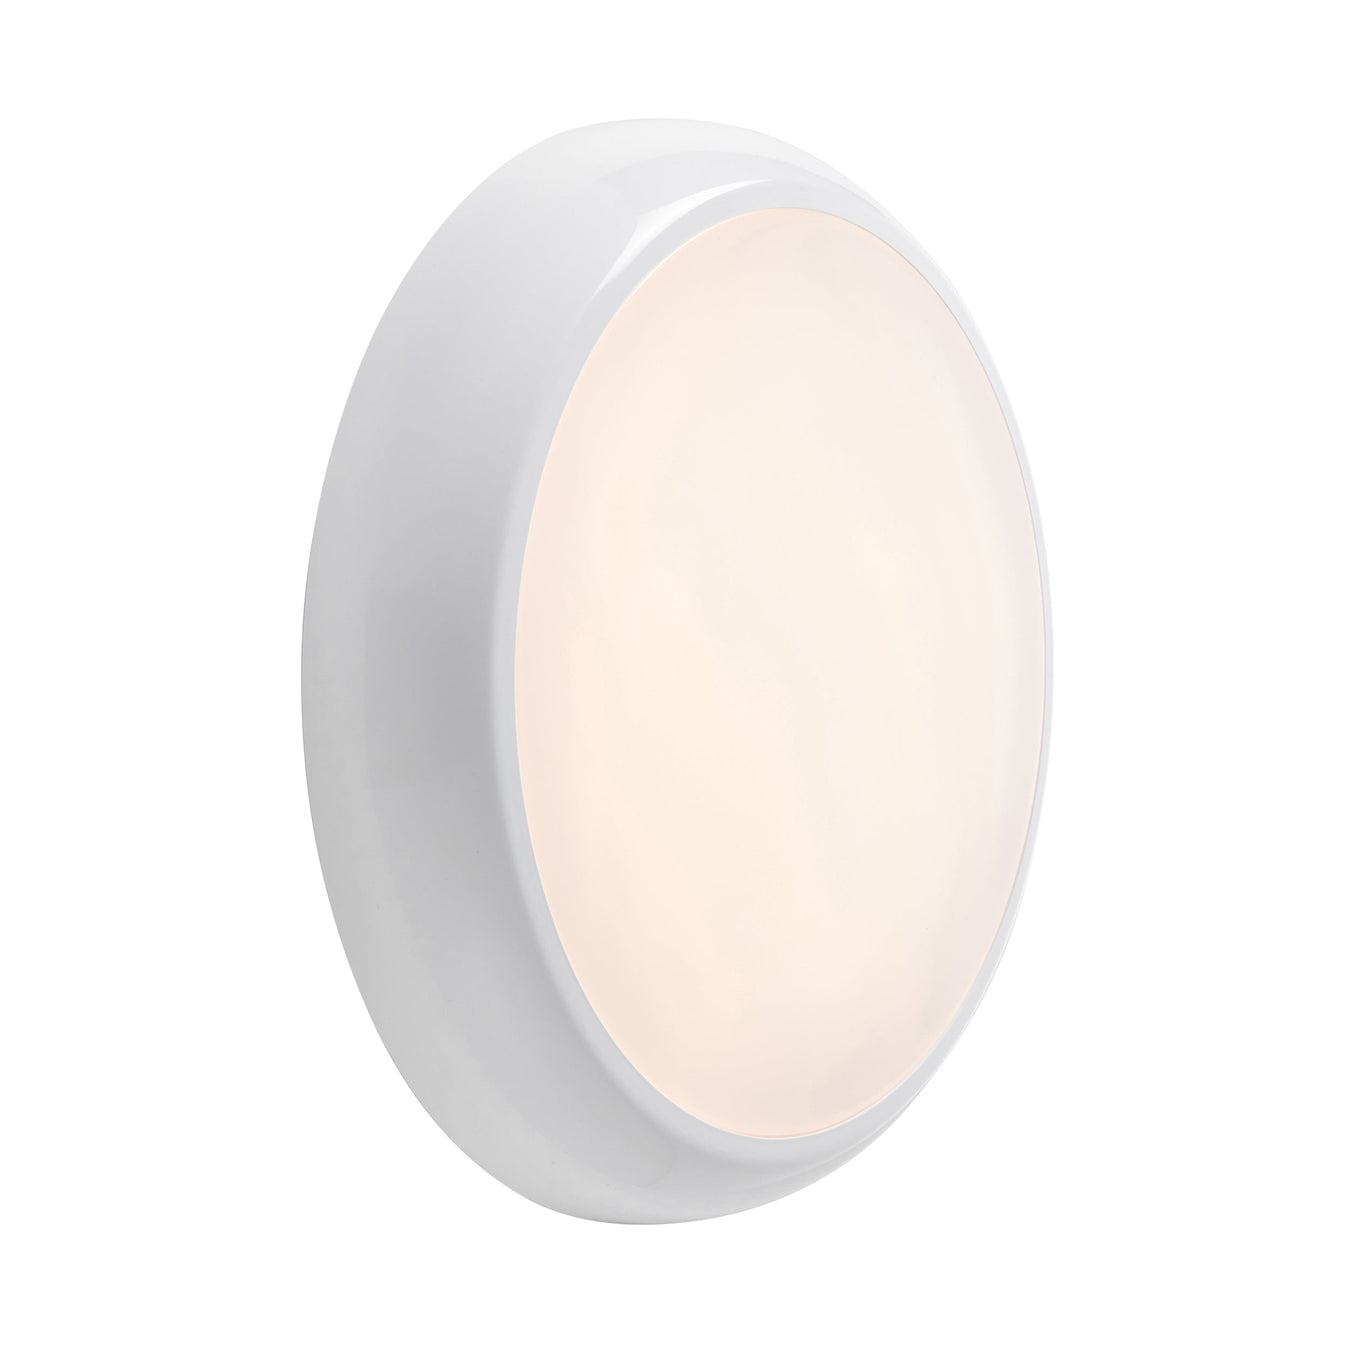
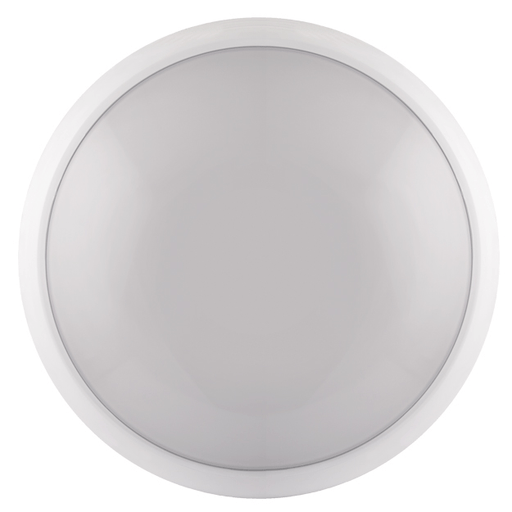
ESP EM14WMAINSCBULK Duceri Mains Powered Circular Bulkhead 14W IP65 White Bezel
Availability:
Dispatch in 1-2 Days
ESP EM14WMAINSCBULK Duceri Mains Powered Circular Bulkhead 14W IP65 White Bezel Product Description Data Sheet: Click Here for Data Sheet
Original price
£30.30
-
Original price
£30.30
Original price
£25.25
Exc VAT
£30.30
Inc VAT
£30.30
-
£30.30
Current price
£30.30
Inc VAT
£30.30
-
£30.30
Exc VAT
Current price
£30.30
Exc VAT

Original price
£41.40
-
Original price
£41.40
Original price
£34.50
Exc VAT
£41.40
Inc VAT
£41.40
-
£41.40
Current price
£41.40
Inc VAT
£41.40
-
£41.40
Exc VAT
Current price
£41.40
Exc VAT
ESP EMSTLED3WMEXBOXU Duceri Emergency Self-Test Exit Box Up Legend 3W LED IP20 White
Availability:
Dispatch in 1-2 Days
ESP EMSTLED3WMEXBOXU Duceri Emergency Self-Test Exit Box Up Legend 3W LED IP20 White Product Description Data Sheet: Click Here for Data Sheet
Original price
£41.40
-
Original price
£41.40
Original price
£34.50
Exc VAT
£41.40
Inc VAT
£41.40
-
£41.40
Current price
£41.40
Inc VAT
£41.40
-
£41.40
Exc VAT
Current price
£41.40
Exc VAT

Original price
£36.37
-
Original price
£36.37
Original price
£30.31
Exc VAT
£36.37
Inc VAT
£36.37
-
£36.37
Current price
£36.37
Inc VAT
£36.37
-
£36.37
Exc VAT
Current price
£36.37
Exc VAT
ESP D6402WH Duceri Emergency Self Test Downlight 3W LED IP20 Open Lens Lithium Battery Non-Maintained White
Availability:
Dispatch in 1-2 Days
ESP D6402WH Duceri Emergency Self Test Downlight 3W LED IP20 Open Lens Lithium Battery Non-Maintained White Product Description Data Sheet: Click H...
View full details
Original price
£36.37
-
Original price
£36.37
Original price
£30.31
Exc VAT
£36.37
Inc VAT
£36.37
-
£36.37
Current price
£36.37
Inc VAT
£36.37
-
£36.37
Exc VAT
Current price
£36.37
Exc VAT

Original price
£51.05
-
Original price
£51.05
Original price
£42.54
Exc VAT
£51.05
Inc VAT
£51.05
-
£51.05
Current price
£51.05
Inc VAT
£51.05
-
£51.05
Exc VAT
Current price
£51.05
Exc VAT
ESP D5403WH Duceri Emergency Self Test Surface Downlight 3W LED IP44 Interchangeable Open & Corridor Lens Lithium Battery Maintained White
Availability:
Dispatch in 1-2 Days
ESP D5403WH Duceri Emergency Self Test Surface Downlight 3W LED IP44 Interchangeable Open & Corridor Lens Lithium Battery Maintained White Prod...
View full details
Original price
£51.05
-
Original price
£51.05
Original price
£42.54
Exc VAT
£51.05
Inc VAT
£51.05
-
£51.05
Current price
£51.05
Inc VAT
£51.05
-
£51.05
Exc VAT
Current price
£51.05
Exc VAT

Original price
£40.58
-
Original price
£40.58
Original price
£33.82
Exc VAT
£40.58
Inc VAT
£40.58
-
£40.58
Current price
£40.58
Inc VAT
£40.58
-
£40.58
Exc VAT
Current price
£40.58
Exc VAT
ESP D520RWH Duceri Emergency Self Test Surface Exit Box 3W LED IP20 Right Legend Lithium Battery Maintained White
Availability:
Dispatch in 1-2 Days
ESP D520RWH Duceri Emergency Self Test Surface Exit Box 3W LED IP20 Right Legend Lithium Battery Maintained White Product Description Data Sheet: C...
View full details
Original price
£40.58
-
Original price
£40.58
Original price
£33.82
Exc VAT
£40.58
Inc VAT
£40.58
-
£40.58
Current price
£40.58
Inc VAT
£40.58
-
£40.58
Exc VAT
Current price
£40.58
Exc VAT

Original price
£40.58
-
Original price
£40.58
Original price
£33.82
Exc VAT
£40.58
Inc VAT
£40.58
-
£40.58
Current price
£40.58
Inc VAT
£40.58
-
£40.58
Exc VAT
Current price
£40.58
Exc VAT
ESP D520UWH Duceri Emergency Self Test Surface Exit Box 3W LED IP20 Up Legend Lithium Battery Maintained White
Availability:
Dispatch in 1-2 Days
ESP D520UWH Duceri Emergency Self Test Surface Exit Box 3W LED IP20 Up Legend Lithium Battery Maintained White Product Description Data Sheet: Clic...
View full details
Original price
£40.58
-
Original price
£40.58
Original price
£33.82
Exc VAT
£40.58
Inc VAT
£40.58
-
£40.58
Current price
£40.58
Inc VAT
£40.58
-
£40.58
Exc VAT
Current price
£40.58
Exc VAT

Original price
£40.58
-
Original price
£40.58
Original price
£33.82
Exc VAT
£40.58
Inc VAT
£40.58
-
£40.58
Current price
£40.58
Inc VAT
£40.58
-
£40.58
Exc VAT
Current price
£40.58
Exc VAT
ESP D520LWH Duceri Emergency Self Test Surface Exit Box 3W LED IP20 Left Legend Lithium Battery Maintained White
Availability:
Dispatch in 1-2 Days
ESP D520LWH Duceri Emergency Self Test Surface Exit Box 3W LED IP20 Left Legend Lithium Battery Maintained White Product Description Data Sheet: Cl...
View full details
Original price
£40.58
-
Original price
£40.58
Original price
£33.82
Exc VAT
£40.58
Inc VAT
£40.58
-
£40.58
Current price
£40.58
Inc VAT
£40.58
-
£40.58
Exc VAT
Current price
£40.58
Exc VAT

Original price
£40.58
-
Original price
£40.58
Original price
£33.82
Exc VAT
£40.58
Inc VAT
£40.58
-
£40.58
Current price
£40.58
Inc VAT
£40.58
-
£40.58
Exc VAT
Current price
£40.58
Exc VAT
ESP D520DWH Duceri Emergency Self Test Surface Exit Box 3W LED IP20 Down Legend Lithium Battery Maintained White
Availability:
Dispatch in 1-2 Days
ESP D520DWH Duceri Emergency Self Test Surface Exit Box 3W LED IP20 Down Legend Lithium Battery Maintained White Product Description Data Sheet: Cl...
View full details
Original price
£40.58
-
Original price
£40.58
Original price
£33.82
Exc VAT
£40.58
Inc VAT
£40.58
-
£40.58
Current price
£40.58
Inc VAT
£40.58
-
£40.58
Exc VAT
Current price
£40.58
Exc VAT

Original price
£44.64
-
Original price
£44.64
Original price
£37.20
Exc VAT
£44.64
Inc VAT
£44.64
-
£44.64
Current price
£44.64
Inc VAT
£44.64
-
£44.64
Exc VAT
Current price
£44.64
Exc VAT
ESP D330AWH Duceri Emergency Hanging Exit Sign 3W LED IP20 All Legends Lithium Battery Maintained White
Availability:
Dispatch in 1-2 Days
ESP D330AWH Duceri Emergency Hanging Exit Sign 3W LED IP20 All Legends Lithium Battery Maintained White Product Description Data Sheet: Click Here ...
View full details
Original price
£44.64
-
Original price
£44.64
Original price
£37.20
Exc VAT
£44.64
Inc VAT
£44.64
-
£44.64
Current price
£44.64
Inc VAT
£44.64
-
£44.64
Exc VAT
Current price
£44.64
Exc VAT

Original price
£36.10
-
Original price
£36.10
Original price
£30.08
Exc VAT
£36.10
Inc VAT
£36.10
-
£36.10
Current price
£36.10
Inc VAT
£36.10
-
£36.10
Exc VAT
Current price
£36.10
Exc VAT
ESP D2413WH Duceri Emergency Downlight 5W LED IP20 Open Lens Lithium Battery Non-Maintained White Bezel
Availability:
Dispatch in 1-2 Days
ESP D2413WH Duceri Emergency Downlight 5W LED IP20 Open Lens Lithium Battery Non-Maintained White Bezel Product Description Data Sheet: Click Here ...
View full details
Original price
£36.10
-
Original price
£36.10
Original price
£30.08
Exc VAT
£36.10
Inc VAT
£36.10
-
£36.10
Current price
£36.10
Inc VAT
£36.10
-
£36.10
Exc VAT
Current price
£36.10
Exc VAT

Original price
£36.10
-
Original price
£36.10
Original price
£30.08
Exc VAT
£36.10
Inc VAT
£36.10
-
£36.10
Current price
£36.10
Inc VAT
£36.10
-
£36.10
Exc VAT
Current price
£36.10
Exc VAT
ESP D2411WH Duceri Emergency Downlight 5W LED IP20 Corridor Lens Lithium Battery Non-Maintained White Bezel
Availability:
Dispatch in 1-2 Days
ESP D2411WH Duceri Emergency Downlight 5W LED IP20 Corridor Lens Lithium Battery Non-Maintained White Bezel Product Description Data Sheet: Click H...
View full details
Original price
£36.10
-
Original price
£36.10
Original price
£30.08
Exc VAT
£36.10
Inc VAT
£36.10
-
£36.10
Current price
£36.10
Inc VAT
£36.10
-
£36.10
Exc VAT
Current price
£36.10
Exc VAT

Original price
£31.29
-
Original price
£31.29
Original price
£26.08
Exc VAT
£31.29
Inc VAT
£31.29
-
£31.29
Current price
£31.29
Inc VAT
£31.29
-
£31.29
Exc VAT
Current price
£31.29
Exc VAT
ESP D151AWH Duceri Emergency Exit Sign Bulkhead 3W LED IP65 All Legends Lithium Battery Maintained White
Availability:
Dispatch in 1-2 Days
ESP D151AWH Duceri Emergency Exit Sign Bulkhead 3W LED IP65 All Legends Lithium Battery Maintained White Product Description Data Sheet: Click Here...
View full details
Original price
£31.29
-
Original price
£31.29
Original price
£26.08
Exc VAT
£31.29
Inc VAT
£31.29
-
£31.29
Current price
£31.29
Inc VAT
£31.29
-
£31.29
Exc VAT
Current price
£31.29
Exc VAT

Original price
£28.74
-
Original price
£28.74
Original price
£23.95
Exc VAT
£28.74
Inc VAT
£28.74
-
£28.74
Current price
£28.74
Inc VAT
£28.74
-
£28.74
Exc VAT
Current price
£28.74
Exc VAT
ESP D121AWH Duceri Emergency Surface Slimline Exit Box 3W LED IP20 All Legends Lithium Battery Maintained White
Availability:
Dispatch in 1-2 Days
ESP D121AWH Duceri Emergency Surface Slimline Exit Box 3W LED IP20 All Legends Lithium Battery Maintained White Product Description Data Sheet: Cli...
View full details
Original price
£28.74
-
Original price
£28.74
Original price
£23.95
Exc VAT
£28.74
Inc VAT
£28.74
-
£28.74
Current price
£28.74
Inc VAT
£28.74
-
£28.74
Exc VAT
Current price
£28.74
Exc VAT
 ESP D120UBR Duceri Emergency Surface Exit Box 3W LED IP20 Up Legend Lithium Battery Maintained Brass
Original price
£43.10
-
Original price
£43.10
Original price
£35.92
Exc VAT
£43.10
Inc VAT
£43.10
-
£43.10
Current price
£43.10
Inc VAT
£43.10
-
£43.10
Exc VAT
Current price
£43.10
Exc VAT
ESP D120UBR Duceri Emergency Surface Exit Box 3W LED IP20 Up Legend Lithium Battery Maintained Brass
Availability:
Dispatch in 1-2 Days
ESP D120UBR Duceri Emergency Surface Exit Box 3W LED IP20 Up Legend Lithium Battery Maintained Brass Product Description Data Sheet: Click Here for...
View full details
Original price
£43.10
-
Original price
£43.10
Original price
£35.92
Exc VAT
£43.10
Inc VAT
£43.10
-
£43.10
Current price
£43.10
Inc VAT
£43.10
-
£43.10
Exc VAT
Current price
£43.10
Exc VAT